


 Find content
 Not Telling


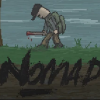

Dumbshit appreciate the feedback however my method was completely different than using Nitroblast (can't even get Nitroblast to work). I started off in PS by creating the text, lassoing out various parts of the text to give it that 'Nitroblast' feel, took out a few more pieces with a Marquee tool. Then went to exporting it as an Adobe Illustrator file. Imported it into C4D then began adding every spline to an extrude, once I did that I grabbed each part that wasn't attached to the text and added more depth to it, then centred it. I then duplicated everything and moved the duplicated part back a bit to give me a bit of room, grabbed each part of the text that wasn't split then reduced the depth by around 40%, added a few more clicks to the caps to bring it out more.
All of what I said could have easily been replicated by using Nitroblast and copy and pasting stuff, however I put in more effort than that. On the point of it being 'plain', that's my forté of graphic design - everybody has their own taste. I'm not always animating my signatures as I prefer still images but I'll certainly take those animation tips on-board.
As for the textures, I don't add many textures to the model in C4D as I prefer to do all that stuff in PS.
Thanks for the feedback.


